Pages

Showing posts with label renovation. Show all posts

Wednesday, October 6, 2010

Painting stripes in the toilet:) You can too!:)

You might like to have a look at my before toilet in the last post... ew. At one stage when we first moved in I preferred public toilets to my own... that is pretty bad right??

In an effort to remedy this earlier this winter I did one layer of the Antique White USA from Dulux in the toilet. I also did two layers of ceiling white. I then ran out of paint..

Of course it was a little boring... and I see so many nice blogs and images online with more exciting paint jobs... So I decided on stripes. But subtle stripes. It is a rental after all!

At this point I had already removed the less attractive gloss royal blue plastic toilet roll holder... just didn't think it would go with my super awesome paint look.


 I also remembered the important things like - putty up the toilet roll holder holes before embarking on the epic paint spree.


I then did the second coat of the Antique White all over the walls - except the wet putty and left it over night to really dry well.
 In the morning I started taping and fixed up the toilet roll holder putty:) This was so the Antique White could dry properly before I put tape on it! I started taping with a level and a metre long ruler, but I found that the ruler alone was enough:) Also I started on a mini wall section that seemed less daunting than the longer wall section. I measured at both the beginnings, ends and at many points in between to get the tape straight.

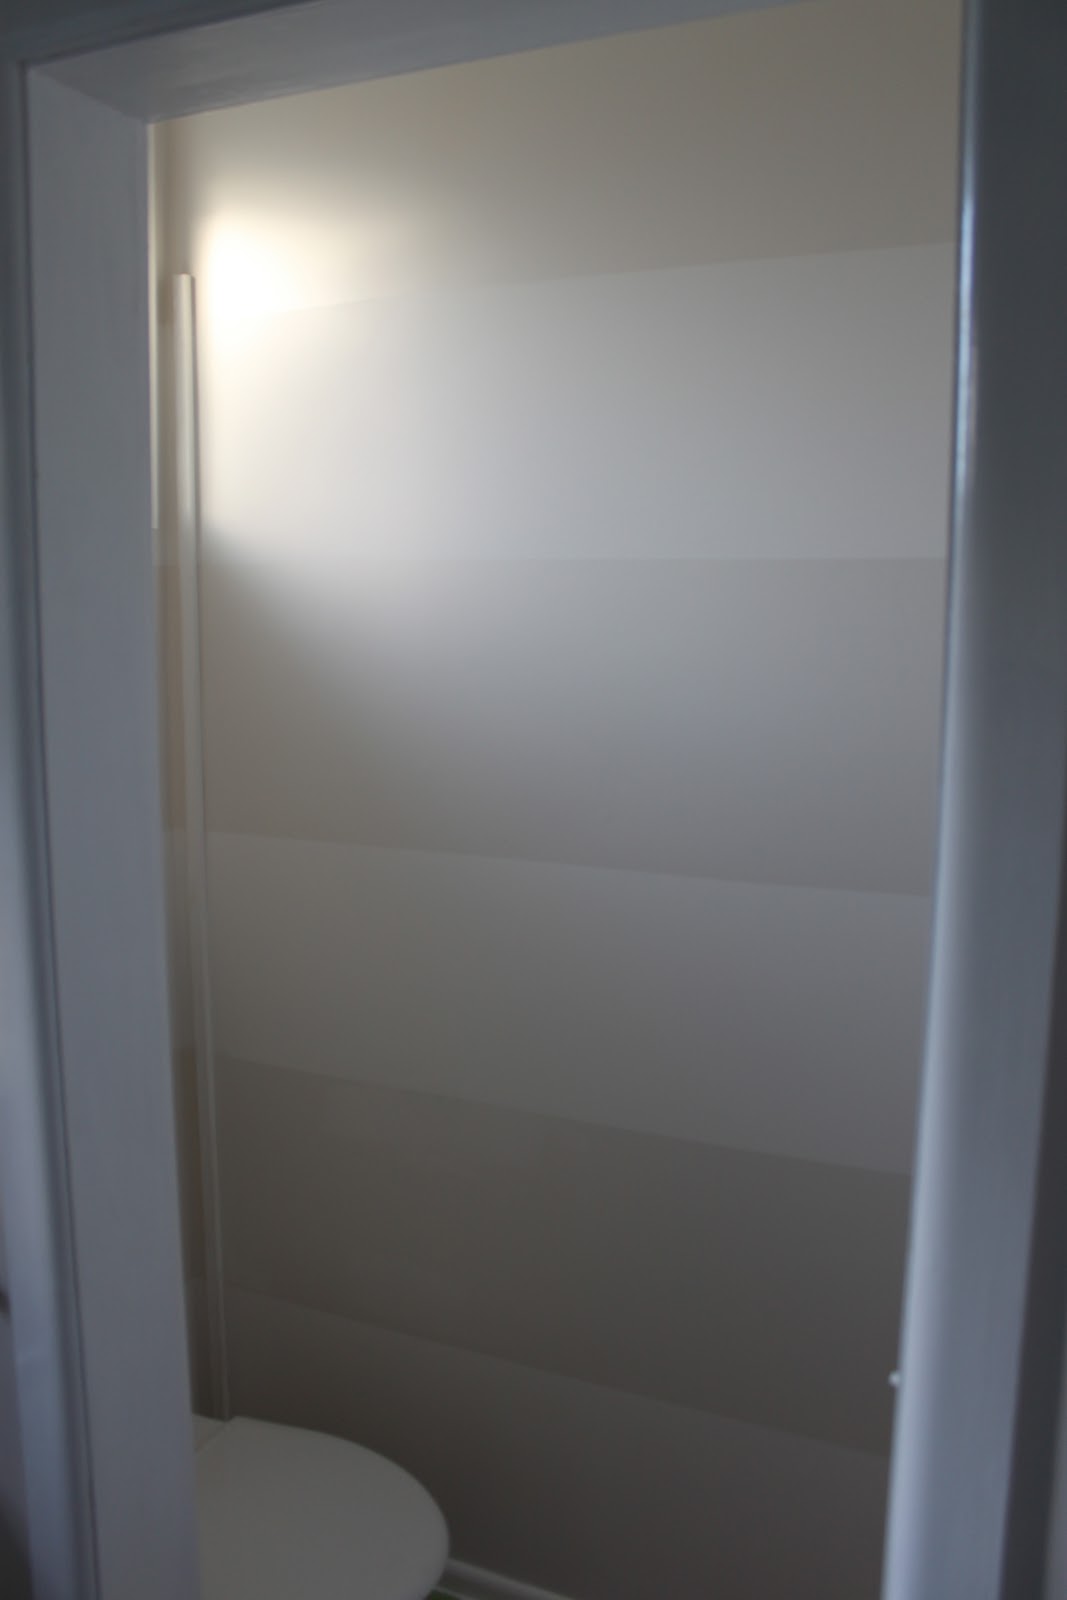
I measured two rows at a time for speed and accuracy... My wall took 5 taped lines - 4 Antique white and 3 contrast.

 I wanted a super subtle effect - very non-offensive but still nice and interesting. I also wanted to reflect the beachy kind of simple aesthetic - we are in a 40 year old beach holiday house so gotta go with that... nothing super fancy!

My original ideas were either and gloss and matte paint contrast or two shades in the original Antique White USA that is all over the house.
But then why introduce new colours? And then I got to why introduce a new can of paint? So I ended up using ceiling white stripes.. I have excess ceiling white why not use it? And with my ceiling white it seems to be not fully opaque so it was perfect, especially with the future gloss white frame work.

I started at the bottom with a ceiling white line because I didn't want the ceiling white stripe touching the ceiling white roof... I used a roller, an edger and a brush to make sure I got into all the corners. I also kept a wet cloth handy to clean up any accidents over the tape lines.


I left the first coat to dry and then went over it with a second coat which fixed up most missed bits. There are still a few but we can go back and fix those up later!

I remember reading somewhere that after using the tape you should pull it off the wall before the paint dries? So I did that after the second coat.

I then gave all the trims a double coat in a gloss white to finish off:)


I left attaching the toilet roll holder until the next day because I  wanted to give the ceiling white paint enough time to dry properly. It was a little IKEA holder (Lillholmen range $9.99), I needed a stainless steel look and a hangy one so no one gets stabbed by the toilet roll holder while at the toilet!
So excitedly my whole toilet renovation cost a grand total of about $14! Tape and the holder! Everything else I already had:)  The whole process took about 4 hours of actual work but happened over 48 hours to get the drying time in for a better finish:)


What do you think? Have you done any bargain renovations lately?

Tuesday, October 5, 2010

Renovation update!

What is this? Obviously it is my house... you can see my glass jar with the laundry powder... must be the laundry! Also you may notice I have been to IKEA... I need to go again. I need to get baskets for the top shelf...

But of course you may be more familiar with this look... the ghetto look of my house...


As you can see, things had to change. Dishwasher in the laundry is only the start of the ickiness! The lino was not my favourite floor surface either:) Neither was the unusual scent coming from the lino behind the toilet... But then after my father in law sorted out the lino and the strange scent, and then this lovely lady turned up! 


The lovely Miss Luey. She is a tiling god. look at those skillz. I know she looks like she is going to the toilet.. she is not. She is just using the environment to enhance her tiling skills! And on her 1 day off of the WHOLE week!


Look... there it goes... a little tiling path...:) Its finished now... but I don't have a picture of that...
Soon I can show you how I painted the toilet! I know.. exciting... but its stripes! Its very lovely:)

Tuesday, August 17, 2010

My kitchen has handles!

Check out mah handles! hehe I attached them:) They are GRIP handles from ikea and at a sweet $5 a pair how can you go wrong??
I picked them because they would not only be very neutral and simple but also because you can't really stuff up their installation... like i could with a handle on the front... I would probably make them all angley.. and not in a cool way...

With the grip handles I attached them using the width of a piece of sticky tape as my measurey guide, I then used my electric drill to put in some holes, using the actual handle as a guide and then screwed in the real screws... took me all of 10 minutes to do all 12 handles! yay! and so technical with my sticky tape... hehe

Sunday, August 15, 2010

The new kitchen! Wellll almost...

My first before and during pics from our ghetto! Its not finished but close enough to give you a sneak peek:) here we go....

These pics show the kitchen as we walked in after the tenant of 7 years left! It needed a mega clean! Cigarette smoke stained ceiling, ingrained mould, lovely peely lino tiles and stiff with grease and oil curtains! Of course a lot of this went that night with some hard cleaning and curtain removal...

More recently the lino tiles were pulled up and replaced with some neutral bunnings tiles installed by lovely sister in law and instructional father in law! She now has a new skill... she doesn't know yet but she is going to teach me how to tile the laundry and toilet... hi Luey! Wanna play tiles??:) hehe Might be another pizza in it? hehe


The cabinets were also removed and yesterday we installed these new ones from the lagan IKEA range. Super bargain at half the cost of their more advertised Faktum range. Since we were going for white anyways to maximise the amount of light in a fairly dark room.... They were pretty easy to install, except when we hit the 60 year old hardwood frame... Can you see our makeshift loungeroom kitchen in the background? Convenient right?


Then this is tonight! Currently no handles... that is a job for tomorrow! And no bench tops.. that is a job for the professionals! Luckily we got them from the same IKEA range for a mega bargain.
The tiles will be padded out with similar tiles in the missing spaces and then all painted to match up. I also need to do a bit of a touch up on the paint job to fix up all the bits that are now uncovered and bright yellow...

But even though it is unfinished we are still super excited to put all our stuff in the clean, fresh cupboards and have a oven that doesn't turn off mid-cooking!

All up this renovation has cost us approximately $1500 and a large amount of hardwork! Yay for bargain renovations to fix up the rental! YAY!

Saturday, August 14, 2010

New Kitch!


This is what we moved in to this house with.... OBVIOUSLY in need of soooooo much work... not only in the cleaning stakes.. also the cupboard door stakes!! See that bottle of bleach? It got used... On the kitchen... still not clean.
Luckily the kitchen is now COMPLETELY gone! And today the floors are tiled (thanks Luey and Ron!) and the cupboards and oven are all ready to go in! YAY! Today! YAY! Of course it won't be finished today... Don't get too excited... But it will be a lot closer than this! hehe

Of course the weird ugly oil and filth coated curtain went away straight after this picture...

Thursday, August 5, 2010

I have achieved a dream...

Laundry Room eclectic laundry room
And that dream is to have my laundry powder in a glass jar... simple things...

(
eclectic laundry room design by housetohome.co.uk)

Saturday, May 22, 2010

More ghetto fabulous!


More of my ghetto not yet fabulous... hehe this will be my future craftroom... there is Al cleaning the walls... good job Al! hehe They don't look like this anymore...

Al's nerd room! No those are not his Winnie the Pooh curtains... they are now gone too... hehe


Master bedroom... you can tell by the built in wardrobe with no doors... That is now a different colour and no weird blue curtains...

How nice is this bathroom... hehe hmmm.... it looks very similar to this still... although I am now the proud owner of a shower curtain... first ever...


Laundry/ Toilet! Dishwasher in laundry? For sure!

Friday, May 21, 2010

Ghetto Fabulous!

I have moved yet again! Currently we are half in half out all over the place! But this house needs some Bobishi love... it is a beach house built in the early sixties and a man with a 'crazy colour' scheme has been living here for 8 years... I thought you guys might like to come on my redecorating/renovating mission? It is my first painting and renovating experience and as Al isn't particularly excited by painting I am working super hard with ever trusty Luetsy assistant (Al's sister:) ).This is what we are working with....
The entrancey/living/dining room....

Just the hot tip... that is no longer red... and the ceiling is no longer navy... and there are no pelmets and no weirdly scented curtains that at some stage appear to have been on fire.....

Then we go into the kitchen.... which looks the same... but cleaner... but it didn't really help... still looks a bit yucky... of course the curtain set up was the first thing to go... hehe


More tomorrow?
You can see my ghetto bathroom, bedrooms and craft room!:)

Tuesday, August 4, 2009

If you are bored and stuck at work... Jacqui... :)


If you are bored and stuck at work I want to show you one of my favourite blogs! Ishandchi - I can get lost here for HOURS. Literally... And what makes it best is that the writer of the blog - Viv - is just LOVELY! She made a custom pink chandelier print for my friend Andrea's "Ladies Lounge". Is was the best. Who can have a ladies lounge without a pink chandelier print?? You can buy them here in her etsy store!

I love to see Viv's home tranform with awesome ideas and lovely finishes. If only I had a house to tranform! Hmmm may be next June, when if all goes well we will be in our new house... hehe saving up those tips from Ishandchi!

Look at Viv's studio transformation.
Before....After....


Anyone who can do that is a genius in my opinion. Especially when only using things from around the house and her K.Rudd stimulus package! Nice! Love that mobile.

Check it out Jacqui! I know you are reading now:) hehe:) Hope you had a lovely engagement party:)
Related Posts with Thumbnails