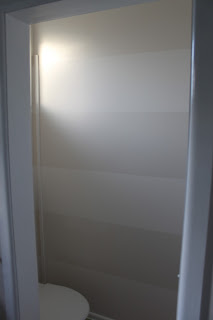
In an effort to remedy this earlier this winter I did one layer of the Antique White USA from Dulux in the toilet. I also did two layers of ceiling white. I then ran out of paint..
Of course it was a little boring... and I see so many nice blogs and images online with more exciting paint jobs... So I decided on stripes. But subtle stripes. It is a rental after all!
At this point I had already removed the less attractive gloss royal blue plastic toilet roll holder... just didn't think it would go with my super awesome paint look.
I also remembered the important things like - putty up the toilet roll holder holes before embarking on the epic paint spree.
I then did the second coat of the Antique White all over the walls - except the wet putty and left it over night to really dry well.
In the morning I started taping and fixed up the toilet roll holder putty:) This was so the Antique White could dry properly before I put tape on it! I started taping with a level and a metre long ruler, but I found that the ruler alone was enough:) Also I started on a mini wall section that seemed less daunting than the longer wall section. I measured at both the beginnings, ends and at many points in between to get the tape straight.
I measured two rows at a time for speed and accuracy... My wall took 5 taped lines - 4 Antique white and 3 contrast.
I wanted a super subtle effect - very non-offensive but still nice and interesting. I also wanted to reflect the beachy kind of simple aesthetic - we are in a 40 year old beach holiday house so gotta go with that... nothing super fancy!
My original ideas were either and gloss and matte paint contrast or two shades in the original Antique White USA that is all over the house.
But then why introduce new colours? And then I got to why introduce a new can of paint? So I ended up using ceiling white stripes.. I have excess ceiling white why not use it? And with my ceiling white it seems to be not fully opaque so it was perfect, especially with the future gloss white frame work.
I started at the bottom with a ceiling white line because I didn't want the ceiling white stripe touching the ceiling white roof... I used a roller, an edger and a brush to make sure I got into all the corners. I also kept a wet cloth handy to clean up any accidents over the tape lines.
I left the first coat to dry and then went over it with a second coat which fixed up most missed bits. There are still a few but we can go back and fix those up later!
I remember reading somewhere that after using the tape you should pull it off the wall before the paint dries? So I did that after the second coat.
I then gave all the trims a double coat in a gloss white to finish off:)
I left attaching the toilet roll holder until the next day because I wanted to give the ceiling white paint enough time to dry properly. It was a little IKEA holder (Lillholmen range $9.99), I needed a stainless steel look and a hangy one so no one gets stabbed by the toilet roll holder while at the toilet!
So excitedly my whole toilet renovation cost a grand total of about $14! Tape and the holder! Everything else I already had:) The whole process took about 4 hours of actual work but happened over 48 hours to get the drying time in for a better finish:)
What do you think? Have you done any bargain renovations lately?


